


KR Maps / Press — Help
Move your photos, keep their locations
Android strips the map location out of any photo it hands to a website — and that location is what draws the routes and maps in your book. Two ways around it, both ending on a computer. Start with Google Photos: if your photos are backed up there, you can download them as a ZIP and drop it in.
Start here
Is Google Photos backing up this phone?
Not sure? Open the Google Photos app, tap your profile picture — the top of that menu tells you whether backup is on and finished.
Route 1 — the short one
Download them from Google Photos
Photos downloaded from your own library still carry their location. Works in any browser, on any computer.
On a computer, sign in at photos.google.com
The same Google account the phone uses. Your whole library is there, trip and all.
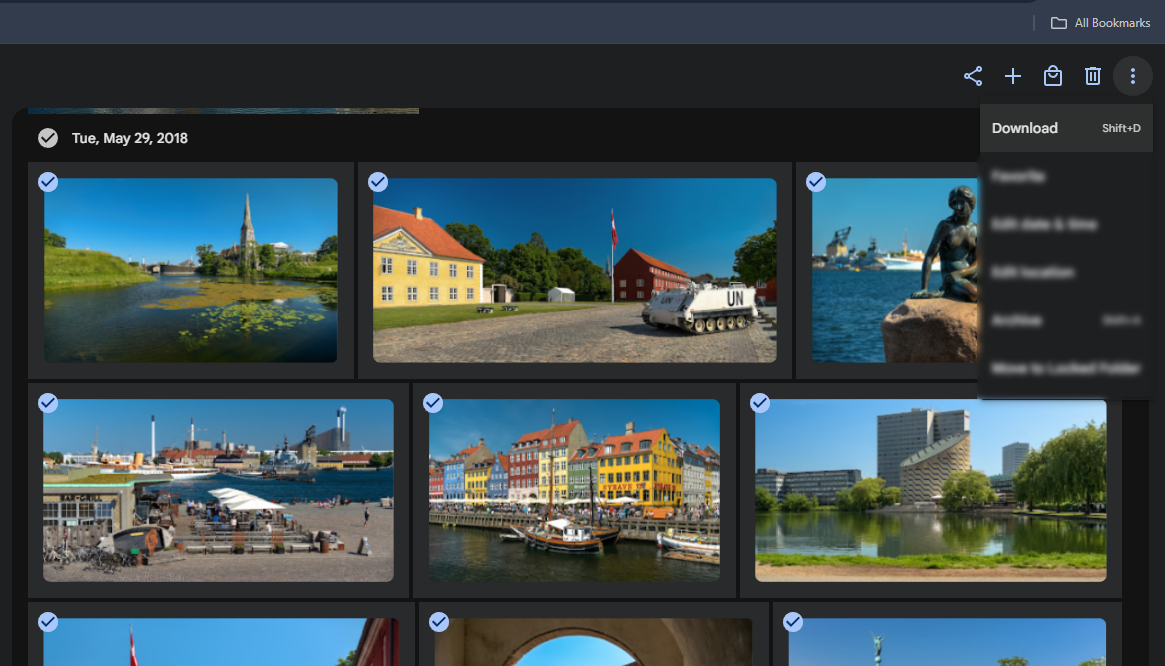
Select the trip photos
Hover a photo and tick the circle in its corner. Tick the first, hold Shift, tick the last, and everything between comes with it.
A trip spanning several days is easier as an album — select once, add to a new album, then work from the album.
Open the ⋮ menu and choose Download
In an album it reads Download all. Either way Google packs them into a single ZIP file — a big trip takes a minute to prepare.
Screenshot — Google Photos
Drop the ZIP straight onto the table in your book
No need to unzip it first — your book opens it for you and starts laying out the days.
One exception
A photo someone sent you through a Google Photos shared link arrives without its location — Google removes it there. Photos from your own library are fine.
Trip missing, or only half there? Backup was probably off for those days, so those photos live only on the phone. Take the cable route below — jump to it.
Route 2 — straight off the phone
The cable route, step by step
For photos that never made it to Google Photos. Written for a Windows computer — on a Mac, read the note further down first.
Plug the phone into the computer and unlock it
Use the cable that came with the phone.
Some spare cables only carry power — with one of those, the computer never sees the phone at all.
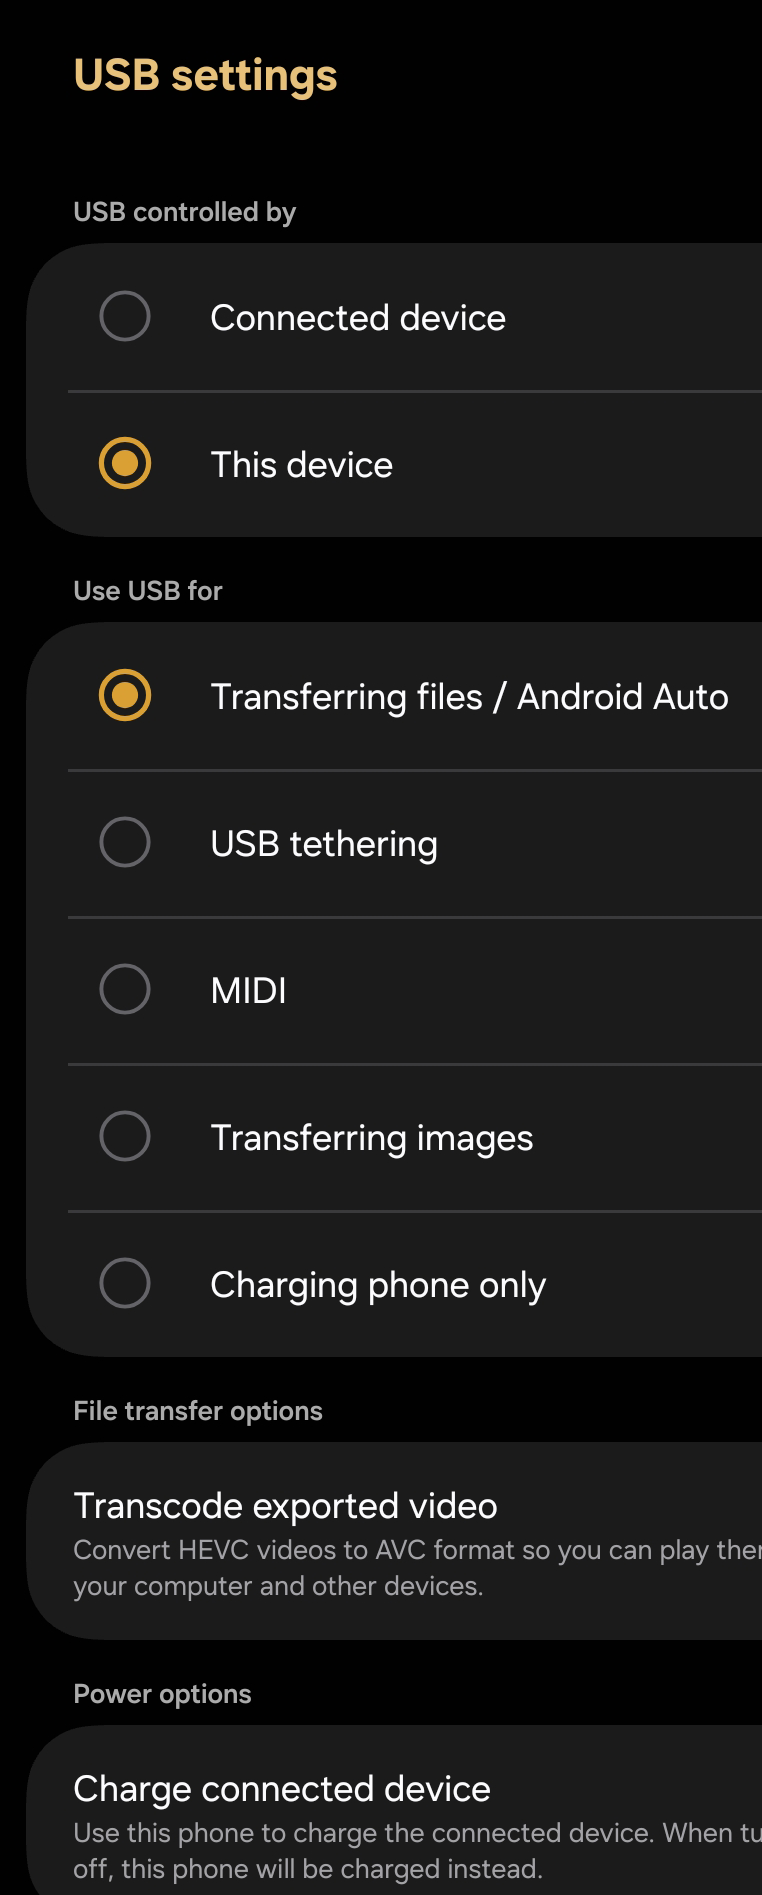
On the phone, tap the USB notification and choose File transfer
The notification reads Charging this device via USB. Some phones word it “Transferring files” or “MTP”.
Until you tap it, the computer sees nothing.
Screenshot — Android phone
The screen you land on after tapping the notification. Under Use USB for, pick the file-transfer option.
Wording varies by phone. This one calls it Transferring files / Android Auto; others say “File transfer” or “MTP”. Charging phone only is the one to move off.
On the computer, open File Explorer and find your phone under This PC
It is listed there by name, alongside your drives.
Screenshot — Windows PC
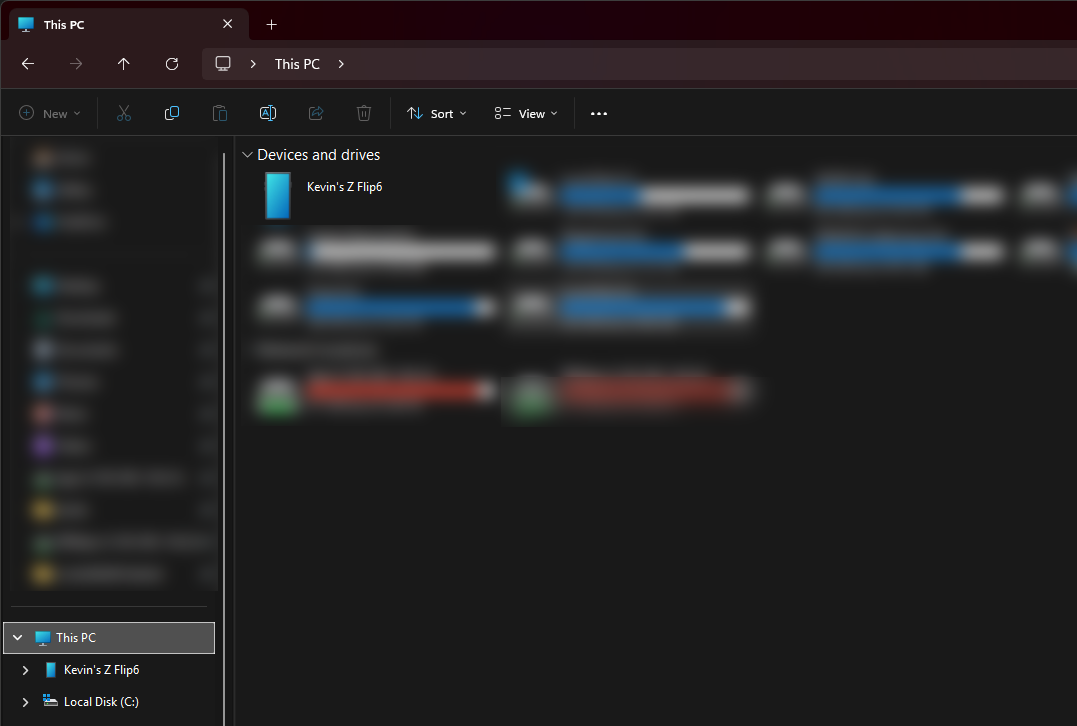
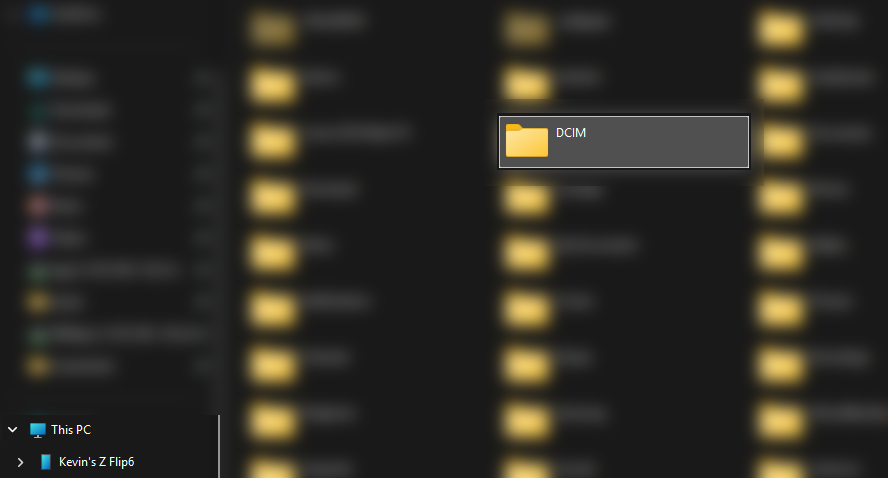
Open Internal storage → DCIM → Camera
That folder is your camera roll.
Screenshot — Windows PC
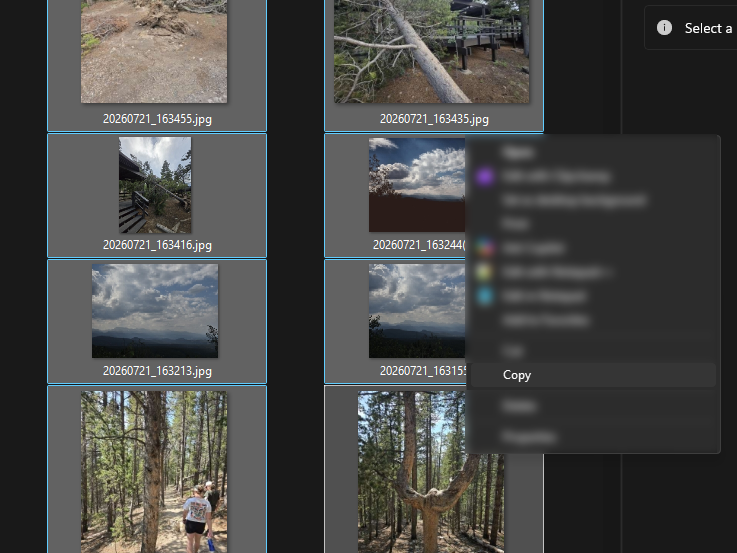
Copy the trip photos into a folder on the computer
Click the first photo, hold Shift, click the last, then copy and paste them somewhere ordinary — the desktop is fine.
Don’t skip this one
Windows shows a phone as a device, not a drive, so a browser can’t read photos straight off it — the upload box looks empty or stalls. Once the photos sit in a folder on the computer, everything behaves normally.
Screenshot — Windows PC
Did it work?
- The photos are in a folder on the computer — not still on the phone.
- Double-clicking one opens it straight away.
- You can unplug the phone now and nothing disappears.
All three true? You’re ready for the book. Anything missing usually means step 2 — the phone slipped back to charging only.
Now put them in your book
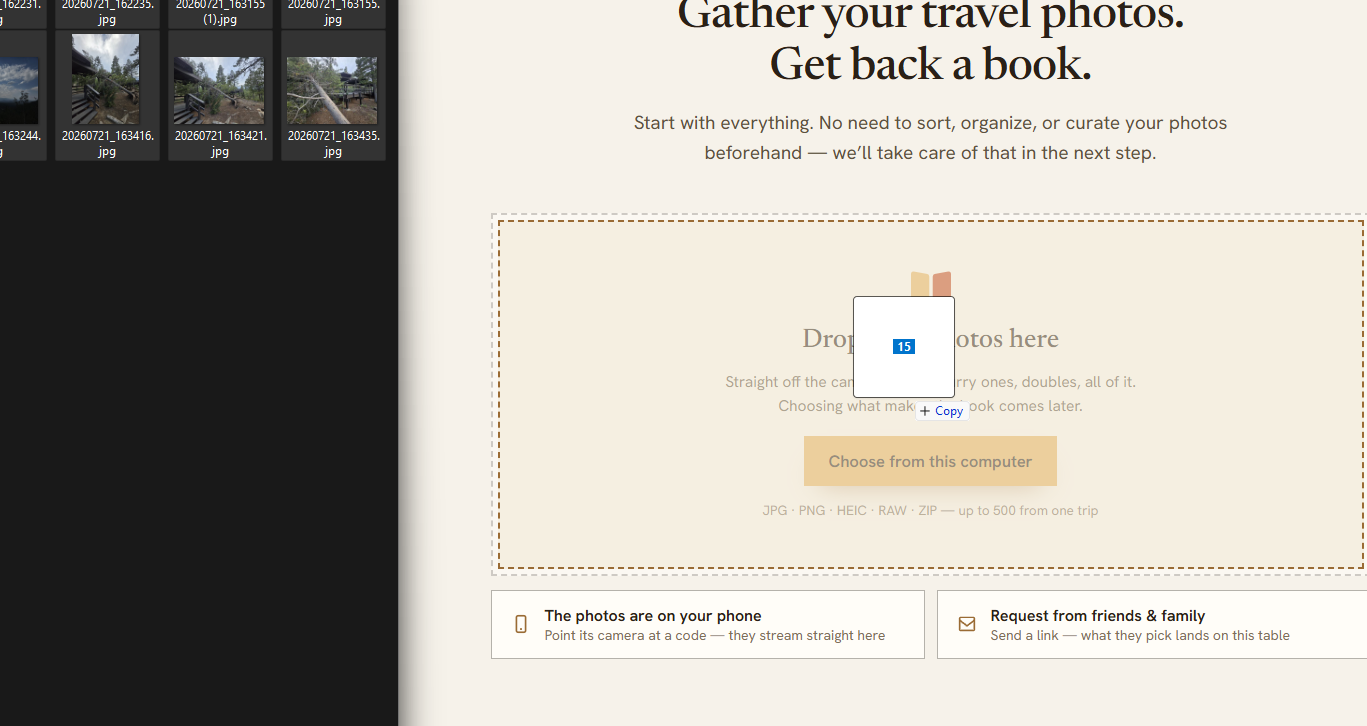
Already started a book on your phone? Keep it. In the builder, choose From a different device to get a private upload link. Open that link on the computer, pick the photos you just copied, and they land in the book you already started — this time with their locations.
Or just begin on the computer. Open the book builder there and drop the folder onto the table. Nothing is lost by starting fresh — the book builds itself from the photos.
Screenshot — book builder
If your situation is different
You have a Mac, not a Windows PC
macOS can’t read an Android phone over USB on its own, and Google retired Android File Transfer in 2024. Route 1 needs nothing plugged in, so try that first. If the photos aren’t backed up and a Windows computer is nearby, the cable steps are the short road. Otherwise install a free helper — OpenMTP is the one most people use.
The DCIM folder is nearly empty
Once Google Photos has backed photos up, “Free up space” deletes the copies on the phone — so they won’t be in DCIM at all. They’re not lost; they’re in your library. Route 1 gets them.
What doesn’t work, however it’s dressed up
Sharing photos into a browser, emailing them to yourself, WhatsApp, Bluetooth, Quick Share. The location is gone on all of them. It isn’t about which app you send from — Android removes it whenever a photo leaves for something that isn’t allowed to see it, and a web page never is.
Either way, you still get a book. Photos with no location still know when they were taken, so the days and chapters build themselves — only the maps go quiet. And you can always point photos out on the map by hand, a few at a time; one answer usually settles a whole afternoon.
Stuck anywhere in this?
Tell us your phone model and which step stopped you — a real person answers, usually the same day.